P3 POLYMERS

REHABILITATION INSERTS / EXISTING STRUCTURES

Put a new structure inside the old one.

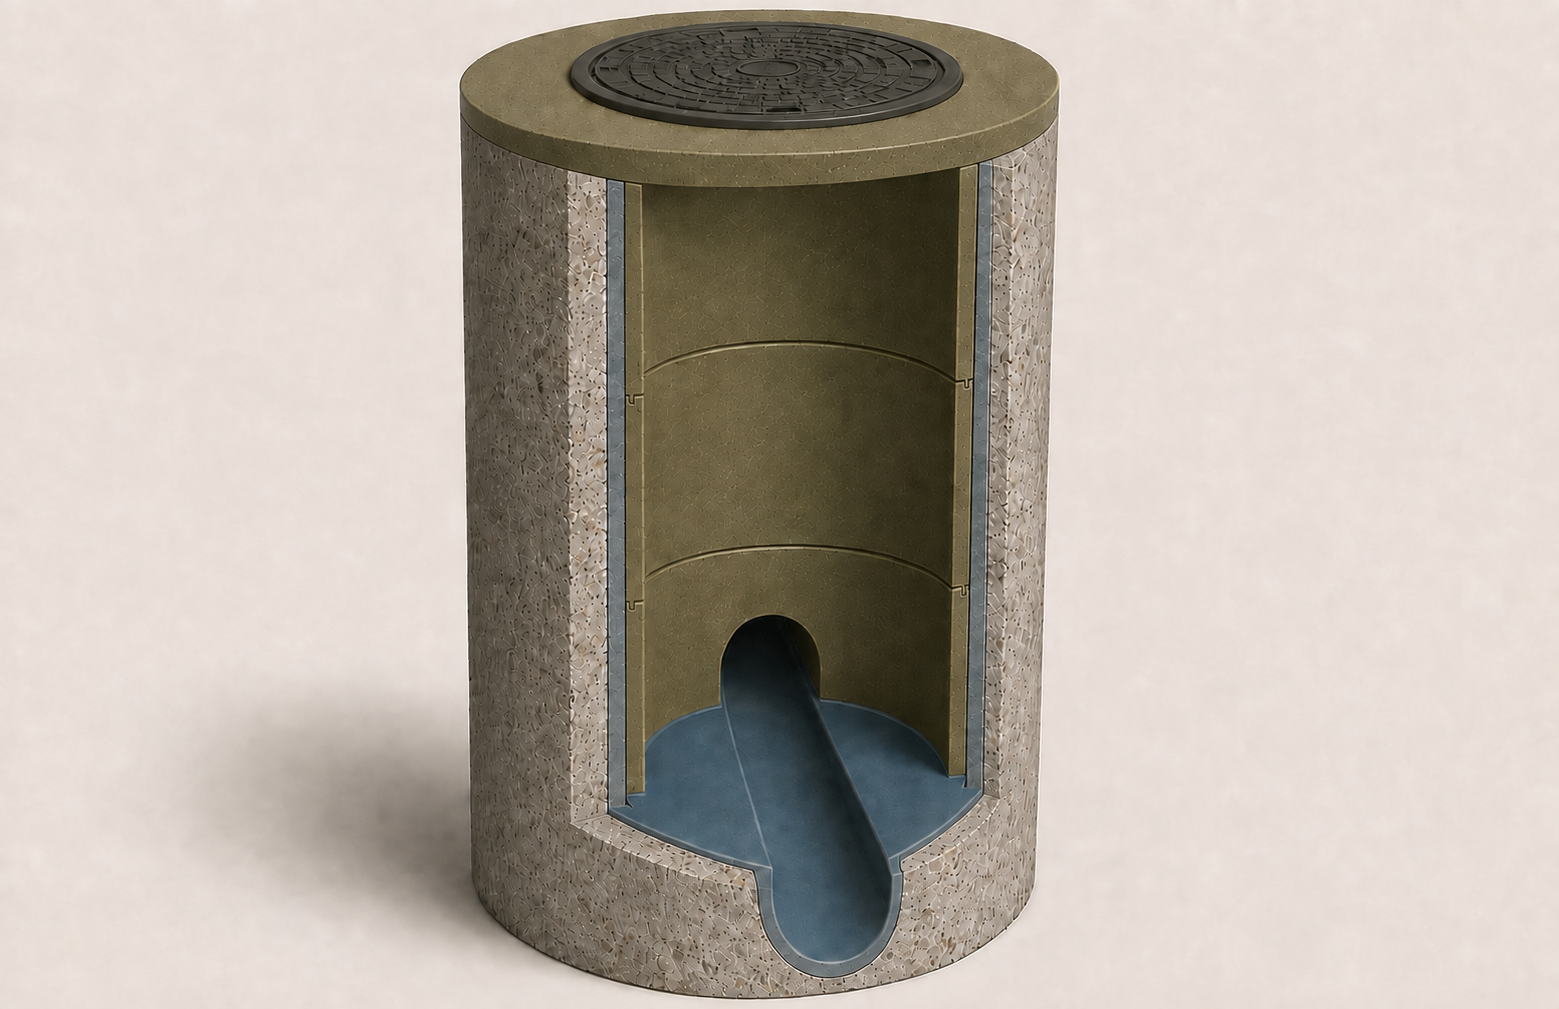
P3’s polymer concrete insert creates a new corrosion-resistant interior system inside a suitable existing manhole—without relying on a thin field-applied coating as the primary barrier.

01 / THE INSERT SYSTEM

More than a lining.

Factory-made polymer concrete sections form the new interior wall. Wet-or-Dry Polymer Grout (WDP) bonds and seals key interfaces, while field work completes the bench and invert, annular space, and new top connection.

Cutaway visualization of an olive polymer concrete insert inside an existing concrete manhole, with vertical annular fill and a blue-gray coated bench and open flow channelIllustrated system arrangement—not a project shop drawing.
REFERENCE DOCUMENTSCarry the concept into project review.
Open example drawing Open installation instructions

02 / PROJECT FIT

Not every failing structure needs to be replaced.

THE DECISION

Can the existing manhole credibly become the host structure?

The insert is fabricated around documented field conditions. Before it is selected, the project team must confirm that the existing wall, base, access, geometry and pipe interfaces can support a practical installation and finished system.

Evaluate an existing structure
01

GeometryInside diameter, depth, taper, offsets and available annular space.

02

ConditionWall and base deterioration, loose material and remaining structural role.

03

InterfacesPipe locations, bench and channel, frame or hatch, and finish elevation.

04

Field planBypass, access, cleaning, lifting, grout placement and return to service.

03 / FIELD SEQUENCE

One coordinated shift—not a series of coating mobilizations.

The sequence is intentionally close to familiar precast work. Actual duration depends on bypass, site access, condition, depth and project requirements.

  1. 01TAKE OUT OF SERVICE

    Open and prepare the host.

    Remove the cone or lid, establish required protection, pressure-wash the structure and remove loose material.

    CRITICAL INTERFACEThe bench and invert must be clean enough for the WDP system to bond.
  2. 02SEAL THE FLOW CHANNEL

    Isolate the pipe invert.

    Use the supplied fiberglass and WDP to keep annular fill out of the active channel.

    CRITICAL INTERFACEThe channel remains defined while the new wall system is built around it.
  3. 03SET THE BASE

    Center, level and bond.

    Bed the short first section in WDP, center it in the host and level it with the supplied fiberglass shims.

    WHY IT MATTERSThe first section establishes the alignment for the full insert stack.
  4. 04STACK THE RISERS

    Build the new interior wall.

    Lower the remaining sections and fully bond every joint with WDP.

    CRITICAL INTERFACEContinuous joint coverage prevents gaps from becoming infiltration points.
  5. 05REBUILD THE BASE

    Tie the bench into the insert.

    Repair and coat the bench and invert, carrying the WDP system up the base insert wall to close the transition.

    WHY IT MATTERSThe wall, channel and bench function as one continuous interior system.
  6. 06FILL + CLOSE

    Complete the annulus and top.

    Fill the annular space with the specified material, install the new flat lid, backfill and return the structure to service.

    FINAL CHECKConfirm the top connection, grade and all project-specific acceptance requirements.

04 / WHY AN INSERT

Move the corrosion boundary out of the field-applied film.

An insert changes what must remain intact. The primary wastewater-exposed wall is polymer concrete through its thickness; the field-applied materials are concentrated at joints and transitions.

01 / PRODUCT

Factory-made structural sections

Wall thickness, geometry and joint profiles are manufactured before the crew enters the site.

02 / INSTALLATION

Familiar setting sequence

No specialized spray truck and no repeated field coats. Sections are lowered, aligned, bonded and grouted.

03 / OPERATIONS

Shorter interruption window

A coordinated installation can reduce bypass duration and repeated mobilization compared with multi-stage rehabilitation systems.

04 / SERVICE LIFE

50-year corrosion warranty

The finished P3 insert system is backed by P3’s standard limited corrosion warranty, subject to its terms and project documents.

05 / START THE EVALUATION

Bring us the manhole before you bring us a solution.

Share record drawings, field dimensions, photos, pipe locations, depth, access conditions, flow and groundwater information. P3 can help determine whether an insert is credible and what still needs to be verified.